Gel Stain Vs Regular Stain Kitchen Cabinets
Samantha is a mom of four who loves crafting, DIY home improvements, and interior design.
Why Use Gel Stain Instead?
Staining your cabinets can be a long grueling process that is enough to deter any homeowner. Typical stain involves a lot of removing cabinet doors, taping, and sanding. Hiring someone to do it for you can be just as hard and even more expensive.
The new trend in the DIY world is gel stain! It is exactly what it sounds like... a wood stain that is gel instead of liquid. This wonderful invention allows you to stain wood without drastic sanding. It will even allow you to stain over painted wood!
Cost of Typical Stain vs. Gel Stain
Cost varies by brand, but a regular stain might cost around $8 per quart while a quart of gel stain might be $16.
I know it seems odd to promote a product that costs double the price, but with typical stain, you need an electric sander, sandpaper in multiple grits, and numerous hours of time. With gel stain, all you need is the stain and a fine sanding block. With both, a quart will go a long way, so you get a lot for your money.
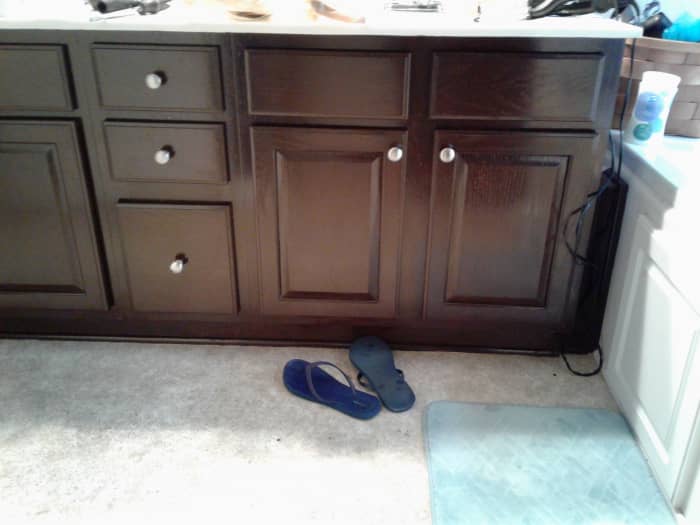
My cabinets, after gel staining.
How to Use Gel Stain on Your Kitchen Cabinets
Step 1: Prep
Remove the cabinet doors and hardware. Make sure you place your hardware in a plastic baggie so you don't lose any of the screws. You could leave the doors on, but you are running the risk of getting stains on your hinges. I would definitely remove the knobs in case you decide to change them out in the future—the cabinet color beneath them will be uniform.
Step 2: Sand
Lightly run a sanding block over the cabinets and doors to give the stain something to stick to. You do not have to sand all the way down to the bare wood or even past the clear coat . . . just give it a light, rough sand. Try to sand with the grain of the wood for a cleaner-looking finish.
Step 3: Apply the Stain
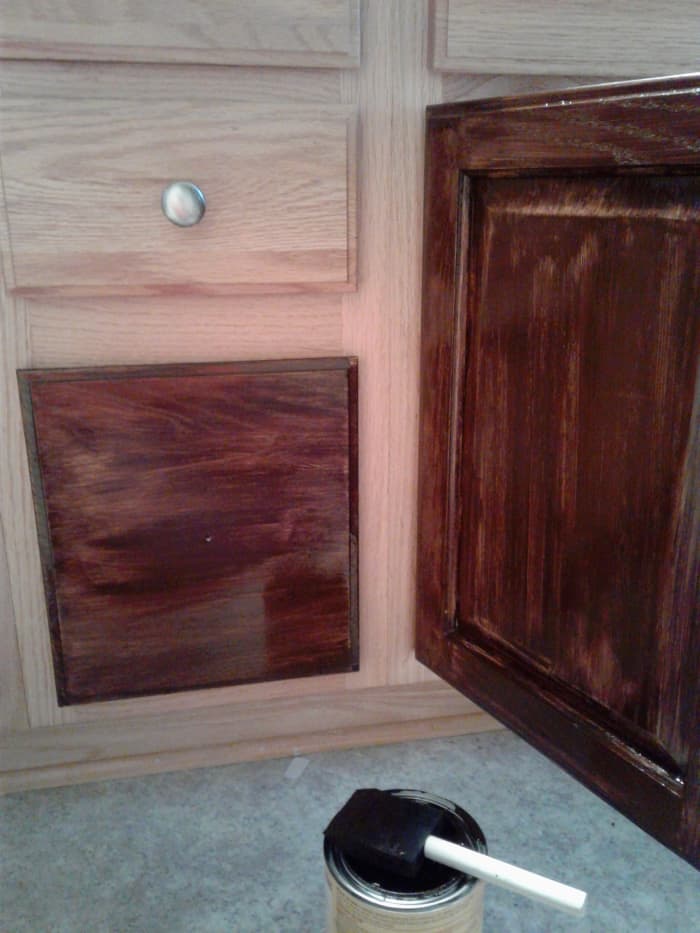
Use a foam brush to lightly paint on the stain. You want to go with the grain of the wood and keep it a very light coat. Gel stain is self-leveling, so it doesn't clump up or run as much as a typical stain. However, the smoother your first coat goes on, the better the finished product will be. I used Minwax gel stain.
Read More From Dengarden
Step 4: Let It Dry
- After you've applied your first coat evenly, leave it for 24 hours.
- Do not put another coat on the cabinets until the first coat is dry.
- Drying may take up to 48 hours, depending on the humidity level.
- You can add fans to the room to help speed up the process.
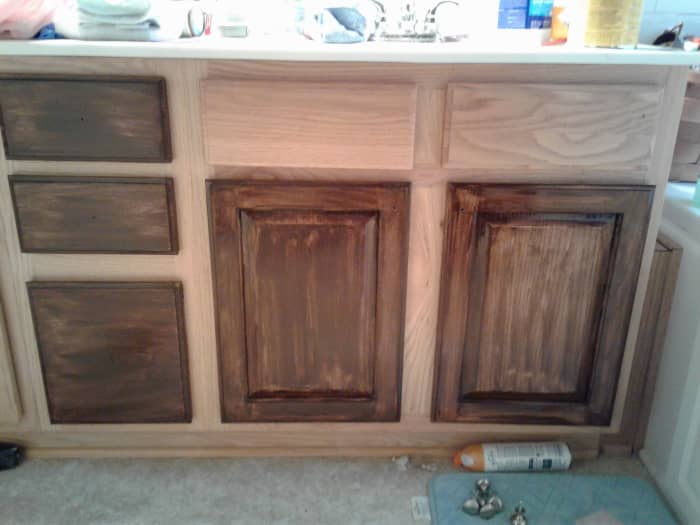
- I did a coat before I went to bed each night until it was done (I may have skipped a night due to laziness). It took three coats for our cabinets to cover completely. It may look streaky when you start, but once you hit that 3rd coat, it will look great!
After First Coat
Step 5: Seal
Once all your coats of gel stain have dried and you are happy with how it looks, you can apply a coat of polyurethane or varnish. I used a fast-drying semi-gloss but you can use whatever finish you would like. The poly just ensures a long life for your new beautiful cabinets. Just paint on a thin coat of poly and leave it for 24 hours to be on the safe side. I used two coats.
Note: Polyurethane is watery compared to the gel stain. I recommend using a bristle brush instead of a foam brush (the foam tends to leave bubbles in the finish). Also, do not shake it before opening... stir it with a paint stick (you will have bubbles in your finish if you shake it).
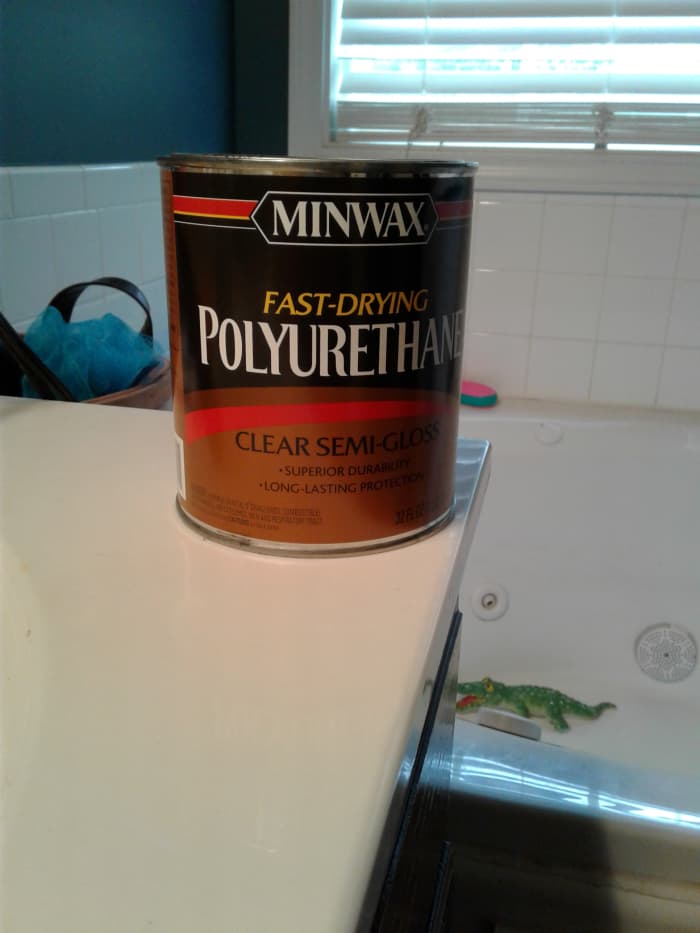
Polyurethane as a Final Coat
Step 6
Stand back and check out the masterpiece you have created! Congratulations!
RB on December 22, 2019:
What brand and color did you use?
Gel Stain Vs Regular Stain Kitchen Cabinets
Source: https://dengarden.com/home-improvement/Using-Gel-Stain